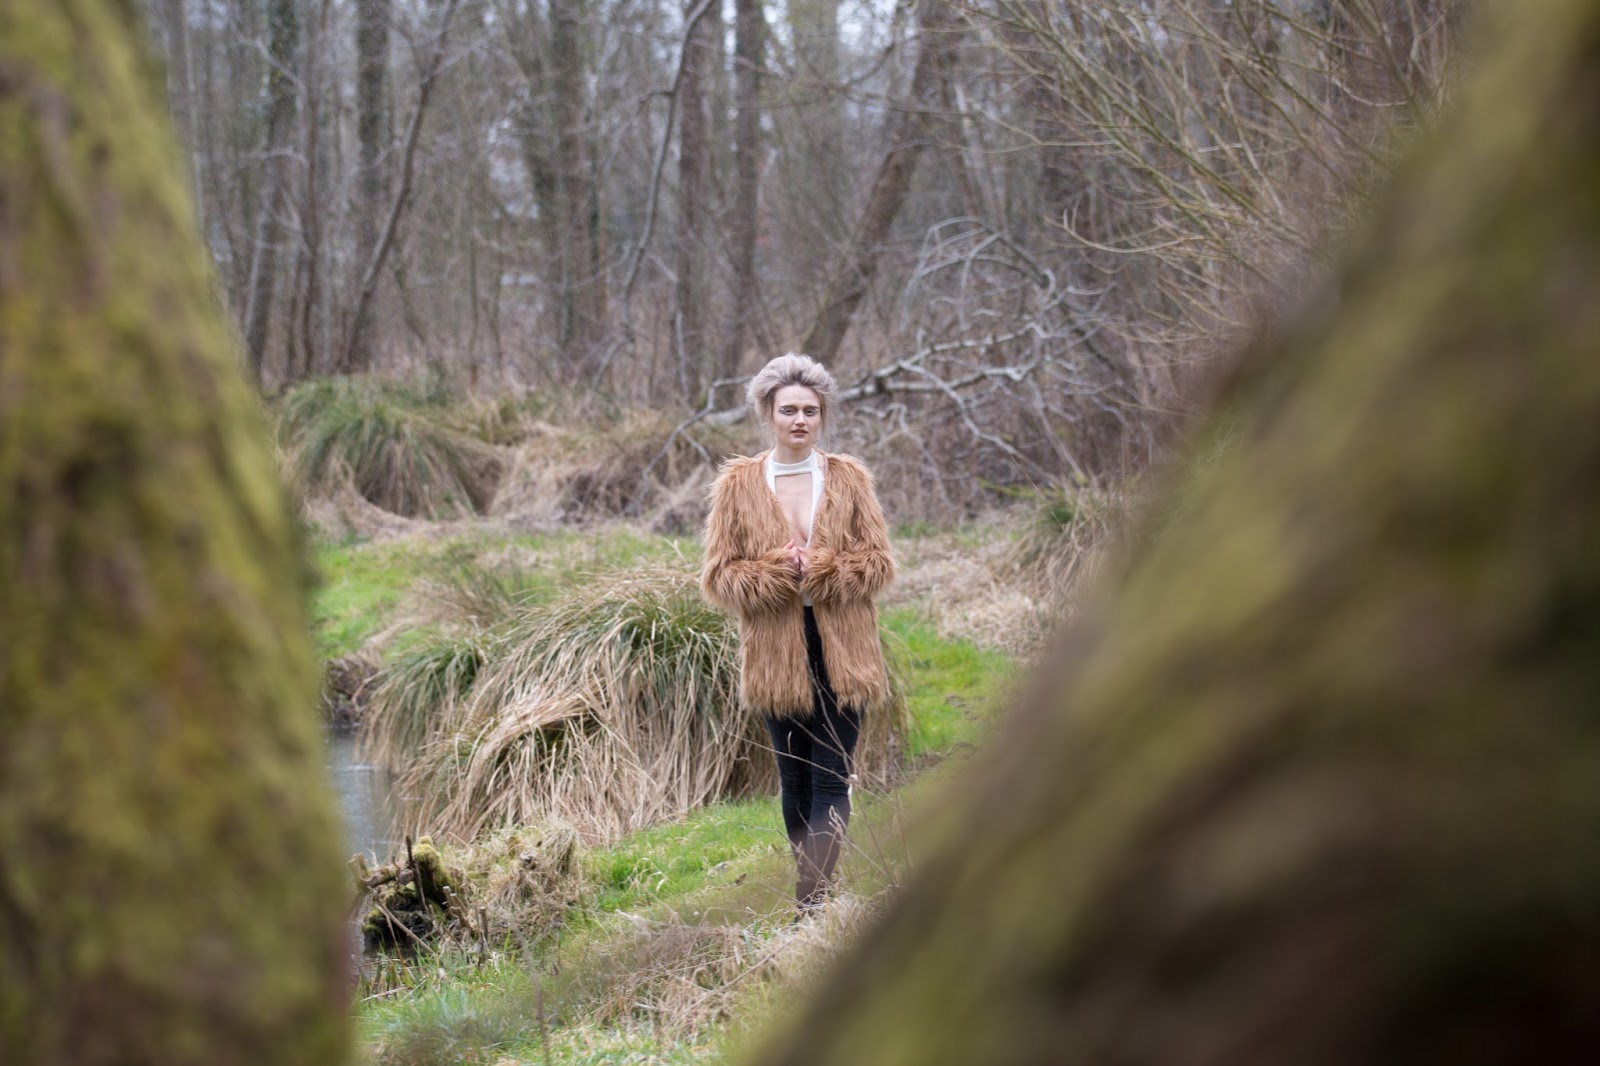
For the deer studio photoshoot, again I decided to keep the hair and make-up clean an simple with the linking element being a diamond deer head cufflink put in several places.
Showing posts with label #innovativeandindependantlearning #goodworkingpractices. Show all posts
Saturday, 26 March 2016
Friday, 25 March 2016
Deer Photoshoot: Unedited Shots
Below are some of the unedited photos from the deer style photoshoot.
There were a few challenges that surfaced when shooting- the main one being that the hair antlers that I made would not stay on the models head. When I tested the antlers on myself they felt secure but in transportation to the shoot the bases of them got crushed and they would not attach to the models head as they kept flopping to the sides. Because of this the photographer and I attached the antlers with string to a piece of wood so that I could hold up the antlers behind the model to make it looks as thigh they were on her head, however my arm was getting in the way of the shots. We came to a last resort where the photographer took photos of the model without the antlers on and then took separate photos of the antlers so that he can photoshop them on to the images in post production. It was also quite a cold drizzly day so the model was a bit chilly and some of the poses were a bit awkward for her to get in as we were shooting on a river bank which was wet and a bit slippy.
Thursday, 24 March 2016
Deer Photoshoot: Behind the scenes
For my additional final photoshoot, I have decided to create a character based on a woodland deer and to photograph it at a trout farm in Winchester which has a variety of different backdrops such as long grass, streams and woodland to shoot in.
When designing the make-up and hair I wanted something striking yet simplistic to represent the beauty and tranquility of a deer, and I also had the idea that I wanted to create antlers out of hair to add an impactful and enchanted element to the shoot.
For the make-up I started by mixing Bobbi Brown foundation in 'Porcelain' with a matte Illamasqua primer and buffed well into the skin. I then concealed any necessary areas. Next I used a L'Oreal cream contour colour to contour the cheekbones and blended. I then powdered the skin to give a matte look and went over the contour with a deep coloured bronzer to give a more chiselled look to the face.
For the eyes I used 'Buck' eyeshadow from the Naked palette by Urban Decay and built up the brown colour in the inner corners of the eyes and the outer corners and under the lower lash line and buffed well to blend. I then took 'Naked' eyeshdow from the same palette and applied it over the lid and then pressed a white Sleek shadow over the top to give a halo effect to the eye. Next I took a white Inglot gel liner and painted small dots in the inner and outer corners of each eye to represent the white flecks that can be seen on some deers faces and chests. To match the white flecks I then used the white gel liner to paint the lashes white and to make the lower water line white to open up the eyes and give a more unusual, magical look to the make-up. To finish the eyes I used a corner of Paperself 'Deer and Butterfly' lashes and painted them with the white liner and stuck them to the outer corners of the eyes. For the brows I combed them into place and then found some tiny twigs and cut them the same length as the brows and stuck them on, using real twigs to keep linking the makeup with nature.
Finally, for the lips I used MAC 'Stripdown' lip pencil to line and fill the lips, giving the model a slightly fuller lip for a more pouty effect. I then highlighted the cupids bow with some of the white gel liner.
For the hair, I pre-made some antlers. I did this by first making the antler shapes out of tin foil, next I wrapped a few layers of strong brown scellotape on top to secure the structure. Finally I bought some hair extensions similar to the hair colour of the model, and I sprayed dry shampoo on them to take away the synthetic shine, I then backcombed them and wrapped them around the antlers and glued into place. For the actual hairstyle of the model I simply backcombed her hair all over and pinned into place and fixed with hairspray.
Saturday, 12 March 2016
Mermaid Photoshoot: Studio Shots
For the studio version of the mermaid shoot again I decided to keep the hair and make-up very simple with the linking element being a shell glued to her ear lobe.
The photographer will merge the top of her head with a rocky sea scene, and he will also photoshop a black turtle neck top on her so that it matches with the other models studio shoots.
Friday, 11 March 2016
Mermaid Photoshoot: Unedited Shots
Below are some of the unedited shots from the mermaid style shoot on the beach.
There were many challenges that surfaced when photographing this look. Firstly it was a very cold and windy day so the model was freezing, which shows in majority of the photos. The tail was also difficult for the model to get in and out of, making it difficult to keep moving locations on the beach. The beach also looked very similar so it was difficult to get a variety of different looking shots like we had on the previous locations.
I am pleased with some of the close up shots as it shows the detail in the make-up, however, the photos with the tail in them look a bit naff as the tail didn't look very realistic, and in the close up images it is not very obvious what her character is meant to be unlike in the previous shoots.
Thursday, 10 March 2016
Mermaid Photoshoot: Behind the scenes
For my fourth photoshoot I chose the location of a beach in the New Forest to photograph the mermaid look on.
When choosing the hair and make-up design, I wanted to have 'classic' mermaid elements such as long natural wavy hair and glittering skin but without it looking too cartoon like and obvious.
For the make-up, I started by mixing Illamasqua hydra veil with Bobbi Brown foundation in 'Porcelain' and an Illamasqua gold cream eyeshadow and buffed well into the skin to give a light coverage with a dewy look. I then applied a Bobbi Brown highlighter all over the cheekbones and down the centre of the nose.
For the eyes I primed them with an Urban Decay 24/7 primer and then applied Urban Decay eyeshadow in 'Half-Baked' all over the lid and under the eye, and blended 'Naked' eyeshadow in the outer corners of the eye. On the inner corners of the eye I applied a glitter fixer and then dabbed some silver holographic glitter onto to highlight the eyes. Next I applied a small amount of mascara to the upper and lower lashes and then applied long individual lashes on the upper eye. For the eyebrows I sprayed hairspray on a spoole and back brushed them to give them a slightly 'wild' and natural look.
For the lips I mixed Sugarpill gold loose pigment in 'Goldilux' with a mixing medium to transform it into a liquid and painted it onto the lips. Finally, I randomly placed pieces of gold leaf and diamantes to the skin of an organic look, and also applied the diamantes in various sizes all over the neck chest and arms to almost look like water droplets.
For the hair, I purposely chose a model with naturally curly hair that was bright red to stand out in the images. I simply sprayed a small amount of dry shampoo in the roots to give the hair volume and texture and then parted the hair to the side.
Tuesday, 8 March 2016
Beetle & Flower Photoshoot: Studio Shots
For the studio version of the beetle and flower shoot I also decided to keep the hair and make-up very simplistic with the linking element being the beetle stuck onto the models cheek.
The photographer will merge the top of the models head from the eyebrows up with either a woodland scene (if it isn't used for the butterfly studio shoot) or a flower/ bunch of flowers.
Monday, 7 March 2016
Beetle & Flower Photoshoot: Unedited Shots
Below are some of the unedited images from various locations in Ashridge woods where the photographer and I photographed the Beetle and Flower look.
A few challenges arose when shooting this look. Similarly to the previous two photoshoots, it was a freezing cold day with bursts of snow so the model was freezing cold so we had to be as quick as possible. It was also a bit windy, so the butterfly kept on blowing out of the hair as it couldn't be attached without being harmed or broken.
However, I am really pleased with the outcome and think it will look especially magical when the photographer edits the photos to make them look as perfect as possible. I really like the way the garland looks in the images and I think it worked well with the hair and make-up designs.
Sunday, 6 March 2016
Beetle & Flower Photoshoot: Behind the scenes
For my third photoshoot I chose the location of Ashridge woods in Hertfordshire again, but in different locations to the previous butterfly shoot.
When choosing a hair and make-up design, I wanted to do something with bright colours to contrast against the dull wooded background and the pastel colours of the flower wreath. I also wanted to have an impactful hair style so decided to style a wig for the shoot. I decided to dress the model in a plain sheer dress so that it wouldn't take any attention away from the hair and make-up.
For the make-up, I started by applying a Bobbi Brown foundation in 'Porcelain' mixed with an Illamasqua matte primer and buffed well into the skin. I followed by concealing any necessary areas and lightly powdering to fix into place. I then used a pink blush to contour the cheek bones and around the head.
For the eyes, I applied a mix of a Kryolan bright blue shadow and an Urban decay shadow in 'Gonzo' into a precise eyelid shape with no blending so that it created a harsh line. I then applied Urban Decay 'Slowburn' eyeshadow around the blue and underneath the eye and blended up to the brow to soften the look. I then applied a yellow Kryolan eyehsadow round the outer edge of the orange to blend further. For the lower waterline I used Inglot eyeliner gel in '70' to make the blue on the lid pop. For the upper lashes I applied media length individual lashes to open up the eye and for the lower lashes I painted them with the Inglot eyeliner gel used in the waterline. Next I coated the eyebrows in Inglot eyeliner gel in '84' and brushed backwards through the brows creating an almost bushy bleached brow look.
Finally, for the lips I applied Lime Crime velveteen matt liquid lipstick in 'Suedeberry'. I then glued two real beetles to her chest with eyelash glue.
For the hair, I braided the models hair in order to make it as flat as possible so that the wig would sit on her head properly, but left the whole hairline out so that it could be blended with the wig. I then pinned the wig into place on the head and blended the models hair with the wig to make it look more realistic. Finally I placed a variety of real beetles into the hair and a real butterfly.
Friday, 4 March 2016
Beetle & Flower Photoshoot: Face chart & test
I tested this look on a face chart and on myself, however I am not keen on using face charts as I do not like the way the make-up goes on the paper as it does not show up the make-up as it would on the face. I prefer working on a 3D facial canvas, but I also feel I produce my best work in the spur of the moment. Therefore for the rest of my shoots I have decided to use the mood boards as inspiration and envisage a make-up design and then carry it out on the day of the shoot so that my creative juices flow organically.
Tuesday, 1 March 2016
The Grange Photoshoot: Studio Shots
For the studio version of The Grange shoot, I decided to keep the make-up very simplistic to contrast with the theatrical look created on the outdoors shoot. For the linking element I decided to use a dark iridescent lip on the model to match the feathers from the collar.
The photographer will marge the top of the models head from the eyebrows up with clouds, as birds fly amongst them.
Sunday, 28 February 2016
The Grange Photoshoot: Unedited Shots
Below are some of the unedited photos from various locations at The Grange where the photographer and I shot the grand bird lady look.
There were a few challenges when shooting this look. Firstly, it was a very cold day (-1 degrees!) so we had to do the shoot in little bursts so that the model could put a big coat on and try and warm up a bit between shots so that she wasn't too cold and didn't look 'frozen' in the photos. It was also a very windy day so the feather eyebrows kept blowing in front of the models eyes and the feather collar also kept blowing up. The wind was also causing the models eyes to water so the makeup in the waterline kept coming off which was tricky to keep re-doing. The wind also kept blowing the models bun causing some of the hair to fall or move so the donut was shown. This will be edited in photoshop to be fixed.
However, I am pleased with the outcome as I think the overall look of the model worked well with the setting of the shoot, and I especially like the variety of backgrounds she is placed against to give an assortment of images.
The photographer will edit these photos so they are suitable to put into my book.
Subscribe to:
Posts (Atom)