Showing posts with label #appropriatematerials #productionprocess. Show all posts

Thursday, 5 May 2016

Final Outcome and Evaluation

The aim of my project ‘Beauty in the Beast’ has been to create a journey into a fantasy world through the medium of a book, where nature provides the backdrop from which to showcase the hair and make up creations. Over the course of this assignment I have learned a lot about myself as a hair and make-up artist, and also about managing and producing all the elements that go into creating an entire project.  

Throughout this project, my ideas changed quite drastically from my initial proposal. Originally I wanted to create a book with ten different photo shoots using elaborate costumes, props, hair and make-up to depict over-the-top dramatic fantasy images, similar to those of photographers such as Kirsty Mitchell and Tim Walker. However, after reviewing my initial ideas, I decided that they were overly ambitious for a small team of just myself and a photographer to achieve in such a short period of time. I also took into consideration feedback that I had received from my tutor reminding me not to be too cliché when creating my shoots and to make sure that they were as original as possible without copying other artists ideas. My tutor was also unsure what my unique selling point would be, so that made me again revise my ideas and come up with a new concept but based on the foundations of the original proposal.

After much thought, research and discussion with my photographer, I decided to go with the theme ‘Beauty in the Beast’, mixing the idea of nature and beauty together in a fairytale style book. I also decided to differentiate my book from others on the market by including introductory prose to each photo shoot, and then to close the chapter having a simplified, studio version of each theatrical shoot, with a double exposure nature image merged into it in order to match the theatrical photoshoot it belongs to, totaling eight different shoots (four theatrical and four studio). I decided as well to include a ‘Behind the beauty’ section at the back of the book showing images of myself creating the hair and make-up looks to give the audience a peek into how the looks were created.  

Once I had decided which shoots I wanted to do, I got busy ordering any supplies, costumes and props I needed and organized my photographer and models, which was quite difficult as my photographer had a full time job so was only available at certain times and my models were all based in different areas around the country, so I had to make sure the schedule suited everyone and that it stayed set. Although this was slightly stressful, it taught me that I have good organization skills, which will be useful for me to have in my career.  I also managed to stay under my initial budget, which was helpful.

When carrying out the shoots themselves I felt that my time management was good as I always arrived at the location early to set up ready for my model in order to be efficient as possible. Although I did not carry out test shoots for the majority of the looks, I did practice the hair and make-up looks before hand so I felt prepared and confident when creating each appearance, and I also always made sure my kit was clean and prepped for the shoot the day before, making me feel professional and organized. However, the rain and wind was a problem when shooting the looks, as the wind was blowing the models hair out of place and was extremely hard to fix outside in the persistent bad weather, and it was making the models freezing cold so they started to look stiff in some of the shots. In an ideal situation I would have waited until the weather was warmer but I shot the majority of my looks over February and early March so had to make the best out of the situation. 

I was extremely pleased with the outcomes of all of the shoots as they captured what I had envisaged and I could not wait to put all the edited images together into my book. I made sure to have plenty of meetings with my photographer so that I had some creative control over the selection and post-production of the images. However, I made the decision that I was not pleased with the mermaid photo shoot that I had done, as I felt there was not a great enough variety of different shots and that it was not of the same standard as the rest of the shoots. In consequence of this I decided not to include it within my final outcome and instead came up with a new concept for another photo shoot in which I only had four days to organize, source my models costume and design a hair and make-up look, which put me under extreme time pressure. Doing this last minute shoot also meant that I did not have time to put my book together before I went on holiday as my photographer had not finished editing the images, which put me behind schedule.  

I felt that up until this point of the project my time management had been carried out well and I was on schedule, but the last minute changes of the final photo shoot jeopardized my project. I was on holiday for three weeks over the Easter period, so when the photographer had edited the images from the last shoot I began to create my book online, but when I went to order it the website would not let me as I was abroad. This started to worry me as it meant that I would have to wait until the end of April to order my book putting me a month behind my initial schedule and not giving me much time to amend any mistakes that may have occurred during the printing process. I received my book a week after ordering, and although the majority was good, there were a few changes I needed to make such as the colouring in some of the images and the clarity of the text. Re-ordering the new version of the book was risky as it was due to arrive a day before my hand in and it also required me to hand paint the front cover so I felt under immense pressure. Luckily the book arrived on time making it possible for me to hand make the front cover in time for submission.


Overall I feel exceptionally pleased with the final outcome of my project and am proud of what I have managed to achieve, and thoroughly enjoyed creating and bringing my visions to life with the help of my brilliant photographer Holden Tuffield. I feel that my book is relevant to the current creative industry as people are always looking for artists to present their work in new and unique ways, which I feel I have done through the use of combining prose, theatrical hair and make-up designs and mixed media photography to create a fantastical peak into an enchanted world. I am confident that my work is of a professional level, as I prepared for my shoots well, chose the locations specifically to fit the ‘Beast’ character I was creating, and worked with a talented photographer and re-toucher so that I could present my images in the best way. If I had had more time, I could develop this project further by creating more concepts for shoots and different stories behind them so that the book would be fuller with many small tales to depict and would show a wider variety of my work and skill sets. I would also potentially create each book with a different hand-made title to add value to the book, much like a collectors item, and I would also sell ‘limited edition’ prints of some of the images from the book framed in elaborate carved gold photo frames. I feel developing these small attributes would further differentiate my book from anything else like it on the market and would make it a truly unique experience to behold. 


Final outcome of my hand-painted 'Beauty in the Beast' book

Wednesday, 20 April 2016

Changes to my time plan schedule

Originally, I planned to have my book put together and sent off by the 25th March before I went on holiday to Australia for three and a half weeks, however because of the late notice Deer shoot, the photographer had not finished editing the shots by that date. 

When I went to order the book whilst I was on holiday, I wanted to order the silver linen book cover but it was not available in the A3 size which was a shame. So instead my only option was black linen which I decided would be fine. Bonus print did not offer an embossing service on the cover which was suitable to what I wanted, so I decided to look else where for an embossing service and chose to still order the book from bonus print. 

However, when I went to order the book, because I was abroad, they would not let me order it which was extremely frustrating as it was complete and I wanted it it be ready for when I got back home, but unfortunately I had to wait til the 19th April when I was back in England to order the book, which put me behind schedule.

Friday, 15 April 2016

Layout of my Book

I have planned to layout my book in a specific way, and will insert the photoshoots in the order they were taken as I think they flow well that way; Butterfly, Crow, Beetle and then Deer. 

The book will be A3 sized with a linen covering and will be created using www.bonusprint.co.uk . The paper will be of a normal standard (not overly glossy) but of high quality. 

The first page of the book will be a small amount of introductory text in a poem format, reading: 

'The Beast appears from time to time 
A dark shadow in sand draws the line 
We choose to cross or hold our ground 
Until Beauty once more can be found 

Everyone of us has a little of the Beauty and the Beast within…' 

On the next page will read the Butterfly poem adjacent to a portrait photo from the shoot, the next two pages will be a double page spread with a singular landscape image spread across both the pages for maximum impact, the same layout will be on the next two pages also. On the following two pages I will take the image of her lying down and mirror it for an effect of butterfly wings which'll look striking and eye-catching. The next two pages will be a portrait shot from the shoot on the left page, and on the right page to end the chapter will be the double exposure image. This layout pattern will follow throughout the book. 

After all of the shoots there will be a page reading 'Behind the Beauty…' and adjacent will be a singular photo of me creating the makeup on one of the shoots. When you turn the page, across the next two pages will be a collage of images of myself creating the hair and make-up looks on my models to give the audience an idea of how the looks were created, and I fell this is a strong USP of my book.

The book will end with a brief page of thanks to my photographer and models. 

Thursday, 14 April 2016

Introductory Poems

To introduce each chapter of the different photoshoots for my book I have collaborated with my Dad to write some short poems to 'set the scene' for each different character. The poems help to enhance the dream-like nature of the book and tie in the idea of an old-fashioned fairytale style.

Each poem will be typed up in word and saved as a PDF and then exported as  JPEG in order to insert into the book in a high quality. The poem with be typed using the font 'Baskerville Old Face' for the main text, and for the first letter in each poem I will make it larger than the rest of the letters, again to bring in the old fashioned style text idea, and I will use the font 'Edwardian Script' so the letter is slightly curled.


Poem for Butterfly shoot:


'A breeze as faint as whispering mice
Crossed her face not once but twice
Beats from two beautifully coloured wings 

Full of magical swirls and circular things

One settled and then more they came
Wonderful beatings again and again
As one by one they arrested on the brightest flower 

Covering her stem like a perfect shower '

Poem for Crow shoot: 


'First the crow came often

With a clump of hair in its beak Its eyes would soften
As its wings became weak

Now the crow doesn’t come To my tree anymore
But I still hear wings hum Past the crack of my door' 


Poem for Beetle & Flower shoot: 


'A black coat dull like rubber she wore

As she crawled across the forest floor 
From leaf to leaf she moved without grace 
Until she found her resting place

Round and pale against her skin
A most strange happening did begin
Her black coat turned to iridescent green 

A prettier beetle had never been seen' 

Poem for Deer shoot: 


'He could not be sure if beast or foul

The faintest trace caught on the breeze 
Perhaps a sound of foot through gorse 
Gone again, if it was ever there

A sight, a glimpse of brown or red 

Then stillness, nothing, shades of green 
Movement definitely down by the copse 
A shape shifting in the blowing grasses

Again once more, this time a story 

There stood the stag in all its glory' 


Saturday, 26 March 2016

Deer Photoshoot: Studio Shots

For the deer studio photoshoot, again I decided to keep the hair and make-up clean an simple with the linking element being a diamond deer head cufflink put in several places. 

The photographer will merge the bottom half of the model with a tree/ woodland scene.


Friday, 25 March 2016

Deer Photoshoot: Unedited Shots

Below are some of the unedited photos from the deer style photoshoot.

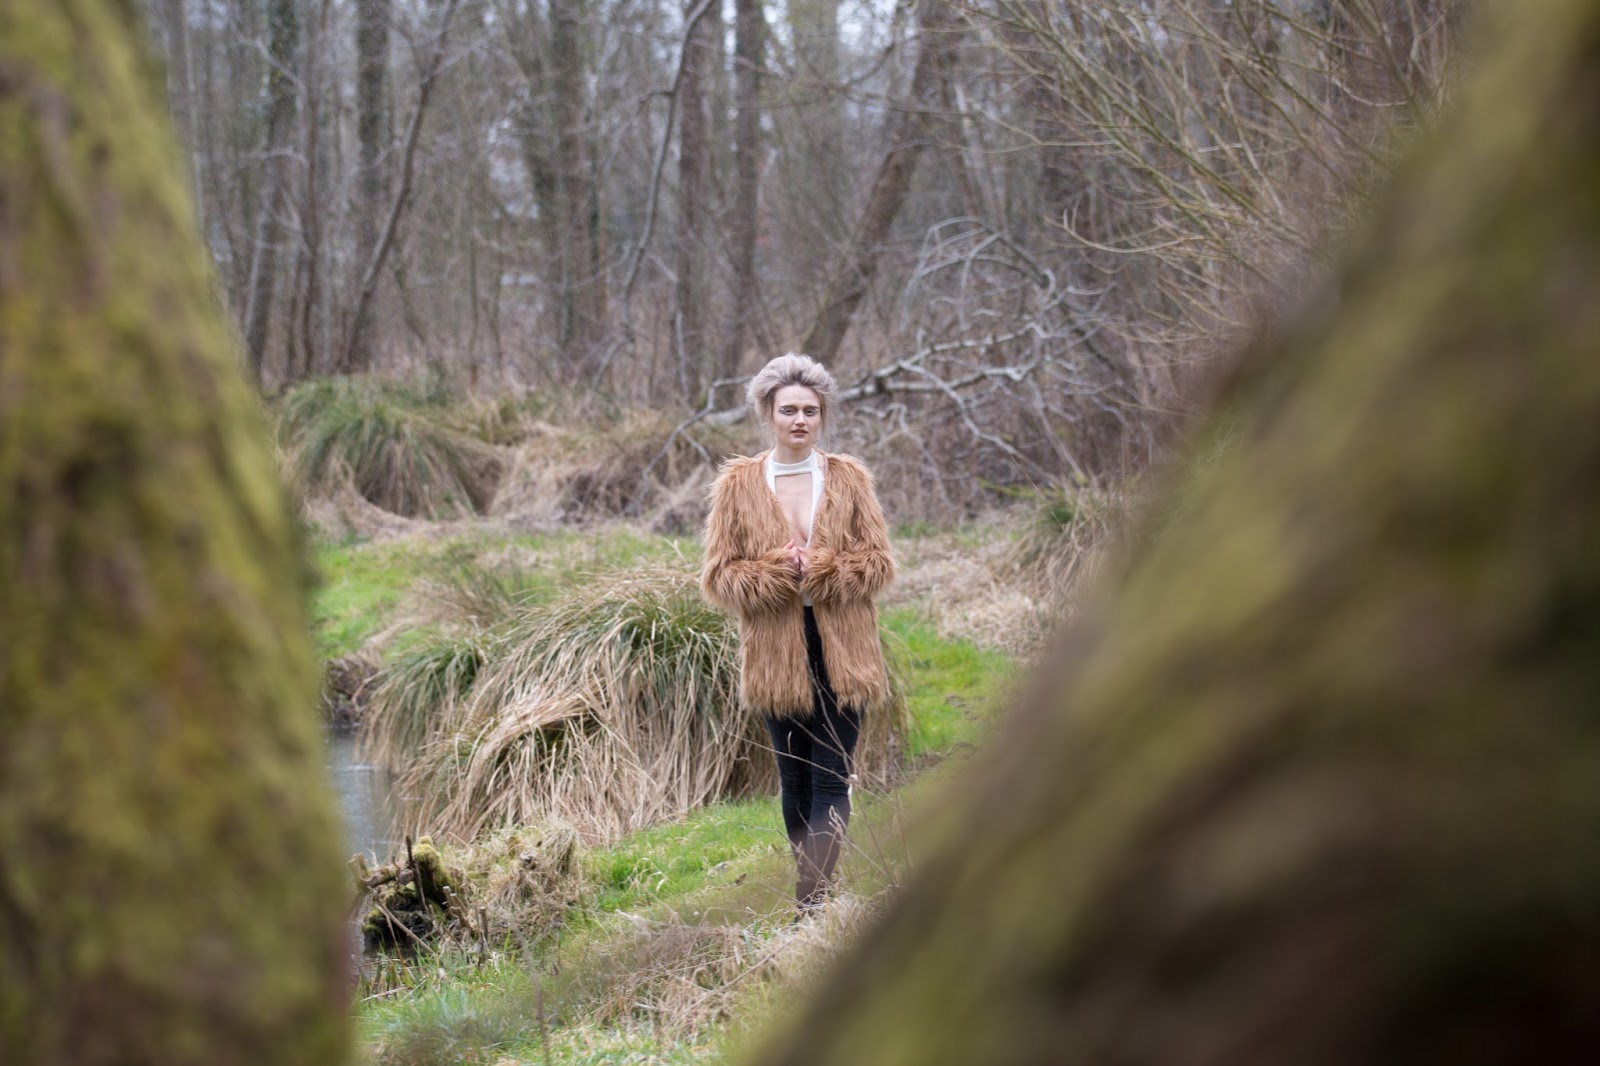
There were a few challenges that surfaced when shooting- the main one being that the hair antlers that I made would not stay on the models head. When I tested the antlers on myself they felt secure but in transportation to the shoot the bases of them got crushed and they would not attach to the models head as they kept flopping to the sides. Because of this the photographer and I attached the antlers with string to a piece of wood so that I could hold up the antlers behind the model to make it looks as thigh they were on her head, however my arm was getting in the way of the shots. We came to a last resort where the photographer took photos of the model without the antlers on and then took separate photos of the antlers so that he can photoshop them on to the images in post production. It was also quite a cold drizzly day so the model was a bit chilly and some of the poses were a bit awkward for her to get in as we were shooting on a river bank which was wet and a bit slippy. 

I am really pleased with the content of the shoot and especially like the close up shots as you can see the detail in the eye make-up. I am excited to see the edited images with the antlers photoshopped on to give the proper deer look to the shoot.


Thursday, 24 March 2016

Deer Photoshoot: Behind the scenes

For my additional final photoshoot, I have decided to create a character based on a woodland deer and to photograph it at a trout farm in Winchester which has a variety of different backdrops such as long grass, streams and woodland to shoot in. 

When designing the make-up and hair I wanted something striking yet simplistic to represent the beauty and tranquility of a deer, and I also had the idea that I wanted to create antlers out of hair to add an impactful and enchanted element to the shoot. 

For the make-up I started by mixing Bobbi Brown foundation in 'Porcelain' with a matte Illamasqua primer and buffed well into the skin. I then concealed any necessary areas. Next I used a L'Oreal cream contour colour to contour the cheekbones and blended. I then powdered the skin to give a matte look and went over the contour with a deep coloured bronzer to give a more chiselled look to the face. 

For the eyes I used 'Buck' eyeshadow from the Naked palette by Urban Decay and built up the brown colour in the inner corners of the eyes and the outer corners and under the lower lash line and buffed well to blend. I then took 'Naked' eyeshdow from the same palette and applied it over the lid and then pressed a white Sleek shadow over the top to give a halo effect to the eye. Next I took a white Inglot gel liner and painted small dots in the inner and outer corners of each eye to represent the white flecks that can be seen on some deers faces and chests. To match the white flecks I then used the white gel liner to paint the lashes white and to make the lower water line white to open up the eyes and give a more unusual, magical look to the make-up. To finish the eyes I used a corner of Paperself 'Deer and Butterfly' lashes and painted them with the white liner and stuck them to the outer corners of the eyes. For the brows I combed them into place and then found some tiny twigs and cut them the same length as the brows and stuck them on, using real twigs to keep linking the makeup with nature. 

Finally, for the lips I used MAC 'Stripdown' lip pencil to line and fill the lips, giving the model a slightly fuller lip for a more pouty effect. I then highlighted the cupids bow with some of the white gel liner. 

For the hair, I pre-made some antlers. I did this by first making the antler shapes out of tin foil, next I wrapped a few layers of strong brown scellotape on top to secure the structure. Finally I bought some hair extensions similar to the hair colour of the model, and I sprayed dry shampoo on them to take away the synthetic shine, I then backcombed them and wrapped them around the antlers and glued into place. For the actual hairstyle of the model I simply backcombed her hair all over and pinned into place and fixed with hairspray.


Saturday, 12 March 2016

Mermaid Photoshoot: Studio Shots

For the studio version of the mermaid shoot again I decided to keep the hair and make-up very simple with the linking element being a shell glued to her ear lobe. 

The photographer will merge the top of her head with a rocky sea scene, and he will also photoshop a black turtle neck top on her so that it matches with the other models studio shoots. 


Friday, 11 March 2016

Mermaid Photoshoot: Unedited Shots

Below are some of the unedited shots from the mermaid style shoot on the beach. 

There were many challenges that surfaced when photographing this look. Firstly it was a very cold and windy day so the model was freezing, which shows in majority of the photos. The tail was also difficult for the model to get in and out of, making it difficult to keep moving locations on the beach. The beach also looked very similar so it was difficult to get a variety of different looking shots like we had on the previous locations. 

I am pleased with some of the close up shots as it shows the detail in the make-up, however, the photos with the tail in them look a bit naff as the tail didn't look very realistic, and in the close up images it is not very obvious what her character is meant to be unlike in the previous shoots. 


Thursday, 10 March 2016

Mermaid Photoshoot: Behind the scenes

For my fourth photoshoot I chose the location of a beach in the New Forest to photograph the mermaid look on. 

When choosing the hair and make-up design, I wanted to have 'classic' mermaid elements such as long natural wavy hair and glittering skin but without it looking too cartoon like and obvious. 

For the make-up, I started by mixing Illamasqua hydra veil with Bobbi Brown foundation in 'Porcelain'  and an Illamasqua gold cream eyeshadow and buffed well into the skin to give a light coverage with a dewy look. I then applied a Bobbi Brown highlighter all over the cheekbones and down the centre of the nose.

For the eyes I primed them with an Urban Decay 24/7 primer and then applied Urban Decay eyeshadow in 'Half-Baked' all over the lid and under the eye, and blended 'Naked' eyeshadow in the outer corners of the eye. On the inner corners of the eye I applied a glitter fixer and then dabbed some silver holographic glitter onto to highlight the eyes. Next I applied a small amount of mascara to the upper and lower lashes and then applied long individual lashes on the upper eye. For the eyebrows I sprayed hairspray on a spoole and back brushed them to give them a slightly 'wild' and natural look.  

For the lips I mixed Sugarpill gold loose pigment in 'Goldilux' with a mixing medium to transform it into a liquid and painted it onto the lips. Finally, I randomly placed pieces of gold leaf and diamantes to the skin of an organic look, and also applied the diamantes in various sizes all over the neck chest and arms to almost look like water droplets. 

For the hair, I purposely chose a model with naturally curly hair that was bright red to stand out in the images. I simply sprayed a small amount of dry shampoo in the roots to give the hair volume and texture and then parted the hair to the side.


Tuesday, 8 March 2016

Beetle & Flower Photoshoot: Studio Shots

For the studio version of the beetle and flower shoot I also decided to keep the hair and make-up very simplistic with the linking element being the beetle stuck onto the models cheek.

The photographer will merge the top of the models head from the eyebrows up with either a woodland scene (if it isn't used for the butterfly studio shoot) or a flower/ bunch of flowers.


Monday, 7 March 2016

Beetle & Flower Photoshoot: Unedited Shots

Below are some of the unedited images from various locations in Ashridge woods where the photographer and I photographed the Beetle and Flower look. 

A few challenges arose when shooting this look. Similarly to the previous two photoshoots, it was a freezing cold day with bursts of snow so the model was freezing cold so we had to be as quick as possible. It was also a bit windy, so the butterfly kept on blowing out of the hair as it couldn't be attached without being harmed or broken. 

However, I am really pleased with the outcome and think it will look especially magical when the photographer edits the photos to make them look as perfect as possible. I really like the way the garland looks in the images and I think it worked well with the hair and make-up designs. 


Sunday, 6 March 2016

Beetle & Flower Photoshoot: Behind the scenes

For my third photoshoot I chose the location of Ashridge woods in Hertfordshire again, but in different locations to the previous butterfly shoot. 

When choosing a hair and make-up design, I wanted to do something with bright colours to contrast against the dull wooded background and the pastel colours of the flower wreath. I also wanted to have an impactful hair style so decided to style a wig for the shoot. I decided to dress the model in a plain sheer dress so that it wouldn't take any attention away from the hair and make-up. 

For the make-up, I started by applying a Bobbi Brown foundation in 'Porcelain' mixed with an Illamasqua matte primer and buffed well into the skin. I followed by concealing any necessary areas and lightly powdering to fix into place. I then used a pink blush to contour the cheek bones and around the head.

For the eyes, I applied a mix of a Kryolan bright blue shadow and an Urban decay shadow in 'Gonzo' into a precise eyelid shape with no blending so that it created a harsh line. I then applied Urban Decay 'Slowburn' eyeshadow around the blue and underneath the eye and blended up to the brow to soften the look. I then applied a yellow Kryolan eyehsadow round the outer edge of the orange to blend further. For the lower waterline I used Inglot eyeliner gel in '70' to make the blue on the lid pop. For the upper lashes I applied media length individual lashes to open up the eye and for the lower lashes I painted them with the Inglot eyeliner gel used in the waterline. Next I coated the eyebrows in Inglot eyeliner gel in '84' and brushed backwards through the brows creating an almost bushy bleached brow look. 

Finally, for the lips I applied Lime Crime velveteen matt liquid lipstick in 'Suedeberry'. I then glued two real beetles to her chest with eyelash glue.

For the hair, I braided the models hair in order to make it as flat as possible so that the wig would sit on her head properly, but left the whole hairline out so that it could be blended with the wig. I then pinned the wig into place on the head and blended the models hair with the wig to make it look more realistic. Finally I placed a variety of real beetles into the hair and a real butterfly. 


Friday, 4 March 2016

Beetle & Flower Photoshoot: Face chart & test


I tested this look on a face chart and on myself, however I am not keen on using face charts as I do not like the way the make-up goes on the paper as it does not show up the make-up as it would on the face. I prefer working on a 3D facial canvas, but I also feel I produce my best work in the spur of the moment. Therefore for the rest of my shoots I have decided to use the mood boards as inspiration and envisage a make-up design and then carry it out on the day of the shoot so that my creative juices flow organically. 

Tuesday, 1 March 2016

The Grange Photoshoot: Studio Shots

For the studio version of The Grange shoot, I decided to keep the make-up very simplistic to contrast with the theatrical look created on the outdoors shoot. For the linking element I decided to use a dark iridescent lip on the model to match the feathers from the collar. 

The photographer will marge the top of the models head from the eyebrows up with clouds, as birds fly amongst them. 


Sunday, 28 February 2016

The Grange Photoshoot: Unedited Shots

Below are some of the unedited photos from various locations at The Grange where the photographer and I shot the grand bird lady look. 

There were a few challenges when shooting this look. Firstly, it was a very cold day (-1 degrees!) so we had to do the shoot in little bursts so that the model could put a big coat on and try and warm up a bit between shots so that she wasn't too cold and didn't look 'frozen' in the photos. It was also a very windy day so the feather eyebrows kept blowing in front of the models eyes and the feather collar also kept blowing up. The wind was also causing the models eyes to water so the makeup in the waterline kept coming off which was tricky to keep re-doing. The wind also kept blowing the models bun causing some of the hair to fall or move so the donut was shown. This will be edited in photoshop to be fixed.

However, I am pleased with the outcome as I think the overall look of the model worked well with the setting of the shoot, and I especially like the variety of backgrounds she is placed against to give an assortment of images. 

The photographer will edit these photos so they are suitable to put into my book.